Sunday, November 20, 2011
How to tune in to internet radio on your computer
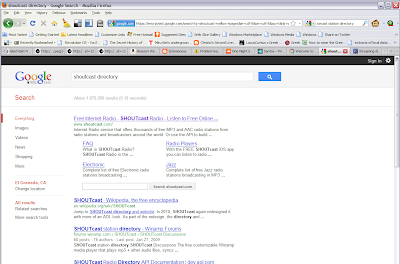
You might see on a web page a fancy message indicating that by clicking on a link or a little "play" arrow, you can tune in to their station in some way. Sometimes you can find a link that is not a proprietary player from a walled garden, and you will be able to save that link and find out what it says by following the approach we are about to show. We'll start with getting a list of stations with a search.
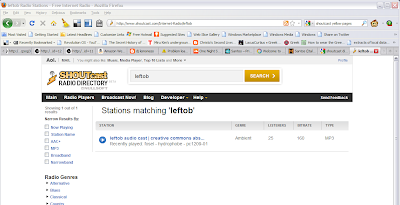
We were looking for a specific station in this case, leftob. You can also search by genre, style or artist, among other criteria. Clicking on the link for leftob will open a proprietary player (or perhaps it opens all by itself), but this is only good for testing. You wouldn't normally come to this website in order to listen to a station, but instead you'd want it in your music player in its library. How to accomplish that?
We'll do a save link as, and get it saved somewhere on your system. But be careful with the file. Clicking on it might invoke it and wipe out current playlist completely if your music player is Winamp or Foobar2000, for example. But it will play on your default music player. It did on mine, iTunes, when I accidentally clicked it, but no harm was done to the overall music library.
Instead what you want to do is rename the file so it is harmless. Rename to a txt file, and maybe differentiate it from others by putting what you think it is into the name. Then go ahead and open it up in Notepad.
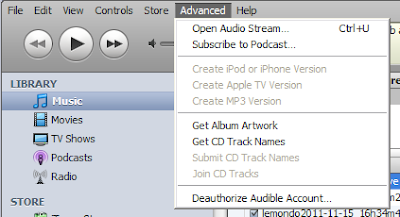
If all goes well, you can go to the advanced menu on iTunes and Open Audio Stream. A GUI opens that lets you enter the URL, which you can copy/paste from the text file.
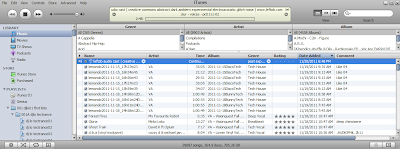
Regardless of whether you click on the downloaded file or you use the "Open Audio Stream" approach, it plays. It is now located in the Music Library and can be dragged into a playlist of your choosing for radio stations, or you can search for it and play it in the Music Library in the future.
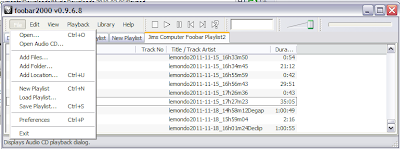
This same technique works similarly in Foobar2000, where you go to File -> Add Location and paste in the URL you copy from the text file you created.
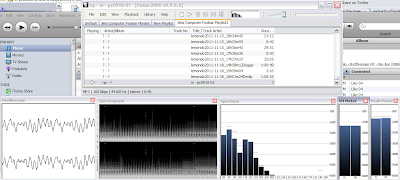
Once it is added, you can play the station as shown with visualizations.
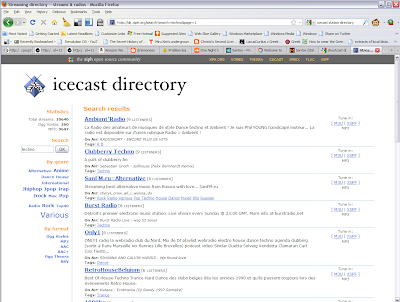
The approach is similar for Icecast. Here we are in the Icecast Directory and we are looking for Techno.
Here we have selected a station and are ready to do a Save Link As on the M3U link on the right.
Yes we want to change that to a text file so we can safely open it up in Notepad.
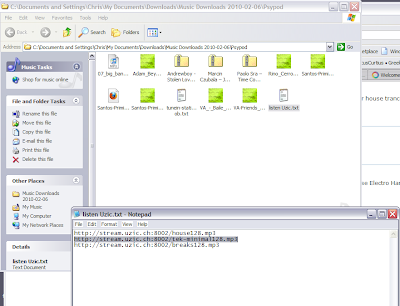
Here we are interpreting the constents of the file and selecting the tek-minal mountpoint link for copying, Ctrl-C.
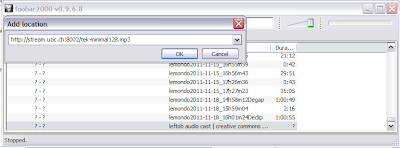
And here we are in the Add Location GUI, pasting the previously copied link, Ctrl-V.
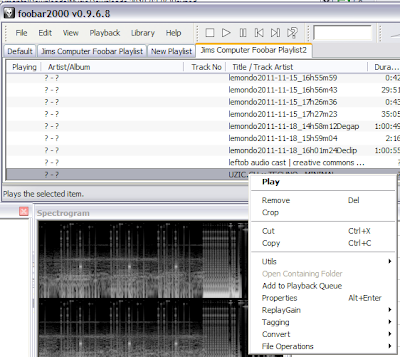
Here we are right clicking the newly added loaction and are about to select Play from the menu.
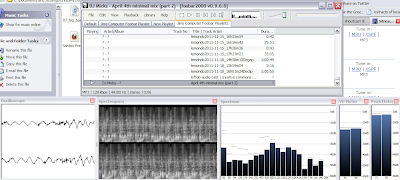
And it plays. So we've seen a couple of examples of unlocking a link and tuning in to an internet station. There are many more stations to choose from than you will find in the local broadcast spectrum, and more independent choices than you will find in satellite subscription. These two examples happen to have very little advertising or promotion either.
Sunday, November 13, 2011
Winamp hints
Sometimes people are motivated to use Winamp. Apparently it can be done, but having tried it, not recommending it because it is easy to crash, lose playlists and rudimentary fading between tracks is quite difficult, though maybe it's not impossible. Start with this article, and focus on the Winamp paragraphs. These are Winamp version 5 screenshots, which would be Shoutcast version 1 only. You need to enter into the Shoutcast DSP three specific pieces of information from your stream host that looks like the following:
IP address
64.34.170.176
Port
15036
Password
bogus1
And you need to set up your selected encoder properly, as in this example:
MP3 Encoder
128KBPS, 44.1KHz, Stereo
IP address
64.34.170.176
Port
15036
Password
bogus1
And you need to set up your selected encoder properly, as in this example:
MP3 Encoder
128KBPS, 44.1KHz, Stereo
Monday, October 24, 2011
Virtual Audio Cable
This piece of software, not super costly, but perhaps difficult to avoid paying for, allows you to talk to two installed soundcards on your machine. In my case, I have a third-party soundcard and an original equipment manufacturer sound chip on the motherboard. Under the control panel, you can see only one of these, but with VAC you can see both, which is essential in Traktor for cue (control room) and final audio mix, one soundcard each. Virtual Audio Cable is easy to find in search, and on my machine it looks like this:
I had to guess at these settings, but the website helped and I also tested the trial first to make sure it seemed to work. Probably you'll have to guess at a bunch of settings unique to your situation. In daily use, I never see this. Just install, make sure you have sufficient sampling in your settings, plenty of cables and forget. The only reason I brought it up now is for this tutorial and so you would have an example.
These audio repeaters I configure every time I stream. In practice I need only the cue (VAC2 in, soundcard out), the mic (soundcard in, VAC3 out) and not the final mix (VAC1 in, OEM sound chip out), because I do not play to a room. I can monitor the stream with Foobar2000 to hear how it sounds to the audience. After I start, it looks like this:
The bars indicate the buffers are working. The cable selections (such as VAC2) are determined by how the stream is configured in Traktor.
Thursday, March 31, 2011
Clipping
Max gain for various mp3 files, short of target dB
What clipping looks like in foobar
Avoid clipping, that is, too much gain at broadcast. Stay away from the redline. If present sounds will be cut off at 0dB with compromise and buzz or fuzzy sound in speakers. MP3 gain at 95.0 dB is too much for many files. At red entries, modify gain to max. Take the gain back a bit for all and the rest will blend better,
Sunday, March 27, 2011
Genres and Styles
A playlist
A screen of the music library
It is easier to create a consistently textured mix where each track flows nicely to the next if you carefully choose compatible genre and style from one track to the next. Precise organization of the track library by folders and playlists is essential, and iTunes is a reliable, flexible tool for accomplishing this. The naming and organizing by genre and style is best determined by each DJ, subject to refinement over time. Consult Wikipedia for definition of each genre and style as needed, for example Techno, and also consult Wikipedia as you think in terms of organizing your collection into a genealogical tree. An excellent graphic of how a tree might be organized is found in Ishkur's Guide to Electronic Music located here.
Thursday, March 24, 2011
Headphones
These are great for monitoring a stream, a lo-fi task. Spatial qualities of sound in a track mix heard only with speakers can be ignored since most listeners use headphones. Engineers set the volume as low as possible and listen closely for mistakes. The only difference at high volume is the mistakes sound even worse. In addition to the models listed in the articles, Bose AE2 seems to be fine.
Saturday, March 12, 2011
Foobar 2000
Subscribe to:
Posts (Atom)